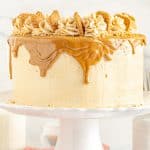
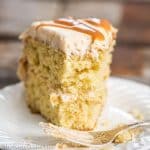
Completely from scratch, 3 layer Homemade Black Forest Cake. The sour cherry filling, whipped cream frosting, and moist chocolate cake make this delicious cake a beautiful presentation!
Homemade Black Forest Cake Recipe
This cake was just another one of those recipes that I would’ve been better of not trying. I don’t usually think that I really like chocolate and fruit together. But after I spent a solid amount of a day developing this recipe, I had to give it a try. And I was utterly in love. This cake is perfect because it is not overly sweet. Because it is stored in the refrigerator it is cool and light…an ideal dessert!
Why is it called a black forest cake?
There are different theories as to how a black forest cake got its name. I don’t 100% know, but I’ve read several different histories online. I do know that is a German cake and many think it came from the 16th century when chocolate first started being used as an ingredient in cakes and cookies. It originated in the Black Forest Region that is also known for it sour cherries or Kirsch (a cherry brandy). Many black forest cake recipes call for Kirsch being brushed on the cake layers and put in the cherry filling. You can try that out if you’d like but we wanted to keep this cake alcohol free.
In 1915 Josef Keller created the first black forest cake. You can see a picture of his recipe book here. Very cool! Although recipes have morphed as years have passed, I still think we ended up with quite an amazing cake here.
What are the ingredients of a black forest cake?
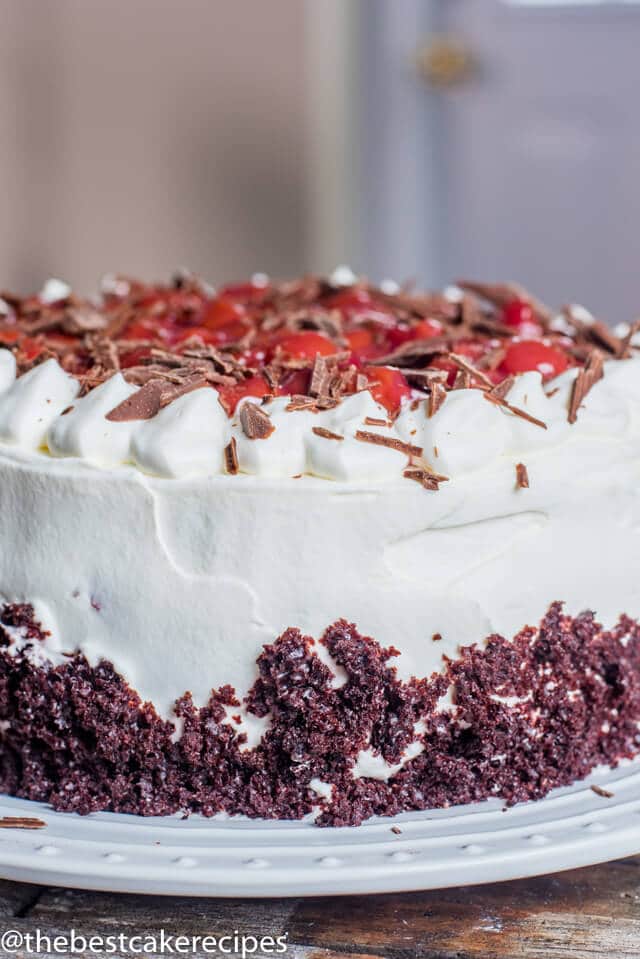
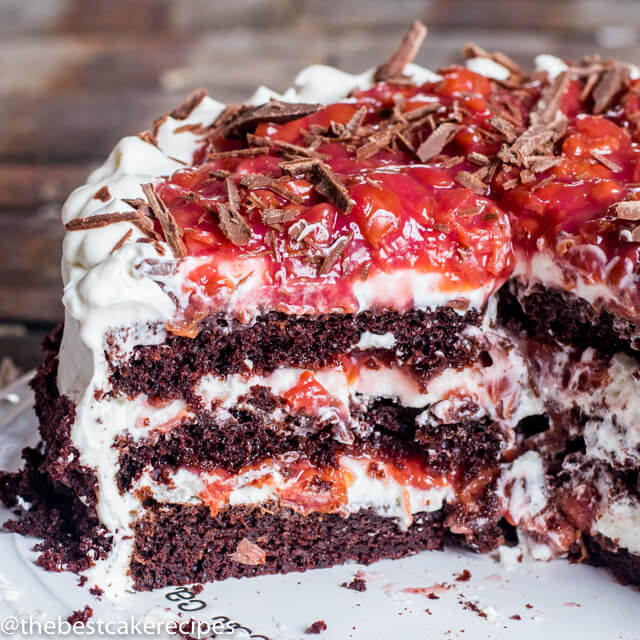
Homemade black forest cake traditionally has several layers of chocolate cake, sour cherries, whipped frosting and chocolate shavings. I’ve seen beautiful cakes with chocolate ganache in the layers…Mmm…I really don’t think you could go overboard on the chocolate here!
How do you make a black forest cake?
This homemade black forest cake is 100% from scratch. There are often ways you can take a shortcut with cake baking, so I figure I’ll give you the full, homemade version and you can take the shortcuts you need.
Here are a few hints:
The cherry pie filling should be made in advance so it has time to cool.
Make the cakes in 2 8″ layers so that you can easily cut them in half. If you use 9″ cake pans, the layers will be too thin.
You can use all 4 layers in your cake if you’d like, but we take one layer and crumble it, using the crumbs to decorate the outside of the cake.
Buttermilk Chocolate Cake
This chocolate cake recipe is our no-fail buttermilk cake. It’s crazy moist and has never not worked for us. For those of you who like moist box mix cakes, this homemade cake is the closest we’ve gotten to a “store cake mix” texture. It’s amazing!
*Don’t want to make a cake from scratch? Use your favorite box mix and bake it in 2 8″ round cake pans*
Sour Cherry Filling
Plan ahead with the filling! This will need to cool completely before you put the cake together.
We used canned sour cherries for our cherry filling. Drain off the juice but reserve ¼ cup. Cook the cherries, sugar, cornstarch (for thickening) and cherry juice in a saucepan. Heat it, stirring constantly until the cherry filling is thickened. Add a touch of vanilla extract and butter for flavor and richness. Mmm…try not to eat all this with a spoon!
*Don’t want to make cherry filling from scratch? Buy canned cherry pie filling.*
Whipped Cream Frosting
I’ll admit. I usually take a shortcut and buy whipped topping. But this cake and it’s whipped cream frosting has made me change my mind. Making your own homemade whipped cream is not hard at all. And there are two hints that make it even easier. Use a COLD metal bowl to whip the cream in. And make sure your whipping cream is VERY COLD. Don’t pull out the whipping cream with other ingredients at the start of making this cake. Make sure it stays in the fridge. Cold heavy cream will make your whipped cream come together beautifully!
Whip the cream until it holds stiff peaks but be careful not to over beat it. Sometimes over beating can make the cream have a weird texture.
*Don’t want to make whipped cream from scratch? Buy 16 ounces of frozen whipped topping and allow it to thaw before frosting the cake..*
How to Store Black Forest Cake
Because of the fresh cream in this homemade black forest cake you’ll want to store this cake in an airtight container in the refrigerator. It’s a great dessert for warm weather because it is cool and creamy!
Wilton 1M Tip: For piping pretty swirls on cupcakes.
Cake Plate: I have this cake plate and everyone loves it! It comes with the cute server too.
Homemade Black Forest Cake
4.47 from 13 votes
Completely from scratch, 3 layer Homemade Black Forest Cake. The sour cherry filling, whipped cream frosting, and moist chocolate cake make this delicious cake a beautiful presentation!
Preheat oven to 350 degrees. Grease and flour 2 round 8-inch cake pans.
Place the flour, sugar, cocoa, baking powder, baking soda and salt in a bowl and whisk together.
In a stand mixer, mix the buttermilk, oil, eggs, vanilla together. Slowly add in the mix of dry ingredients while the mixer is on low. Add the coffee and make sure everything is combined. The batter will be very thin.
Pour the batter into the prepared pans and bake for about 30 minutes or until a toothpick inserted in the middle comes out clean.
Allow the cakes to cool on a wire rack for 10 minutes. Turn the cakes out onto a cooling rack.
Once the cakes are cooled, slice each cake layer in half so you end up with 4 layers.
Crumble one layer into cake crumbs. These crumbs will be used to decorate the cake.
Make the Cherry Filling:
While the cake is baking, prepare the cherry filling.
Drain the cherries but reserve ¼ cup cherry juice.
In a skillet or 2 quart saucepan over medium heat, heat the cherries, reserved juice, granulated sugar and cornstarch. Cook and stir until slightly thickened (about 3-5 minutes).
Stir in the vanilla extract and butter. Mix until the butter is melted.
Set the cherries aside to cool.
Make the Whipped Cream Frosting:
Chill the metal bowl of a stand mixer (or a large metal bowl to use with a hand mixer) for at least 5 minutes.
Add the heavy cream and powdered sugar to the bowl. Beat on high for 3-5 minutes or until stiff peaks form.
Place the frosting in the refrigerator until you are ready to assemble the cake.
To Assemble the Cake:
Place one cake layer down on a cake plate.
Top with 1 cup of whipped topping. Spread to cover the cake.
Spread ¾ cup cooled cherry filling over the whipped cream.
Place a 2 layer of cake on top of the cherries.
Repeat with another cup of whipped cream, ¾ cup of cherry topping and third cake layer.
Frost the entire outside of the cake with the whipped frosting, setting aside about 1 ½ cups for making dollops of frostings around the top.
Press the crumbled cake crumbs onto the bottom half of the cake all around the sides.
Spoon the remaining cherry filling on top of the cake to about 1" from the edge.
Place the reserved whipped frosting into a large decorating bag with a Wilton 1M tip. Squeeze stars around the outer top edge of the cake.
Sprinkle the cake with shaved milk chocolate if desired.
Refrigerate immediately until serving. Store any leftovers in the refrigerator in a covered cake container.
Video
Notes
The calories shown are based on the cake being cut into 15 pieces (all of the frosting and cherry filling used), with 1 serving being 1 slice of cake. Since different brands of ingredients have different nutritional information, the calories shown are just an estimate.
We are Julie, Maddie, and Kinslee – a mother and daughter team sharing with you the best cakes to satisfy any need or sweet craving that you may have. Welcome to our family’s kitchen!

 Buttermilk Chocolate Cake
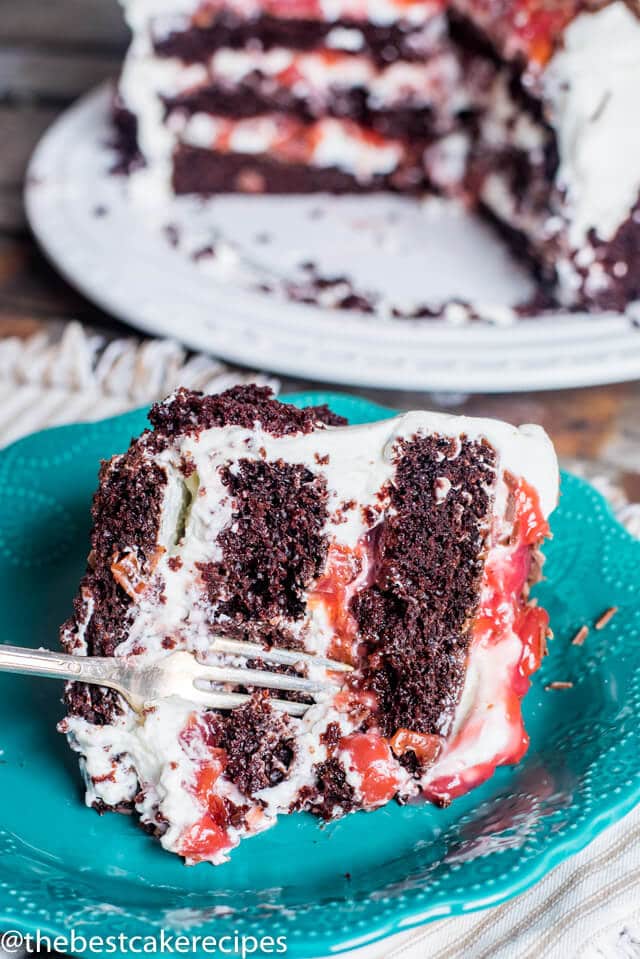
This Black Forest cake was the best ever!!!!
This cake is a must to make …amazing…love it!!!