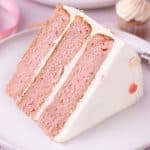
Strawberry Vanilla Cake
Learn how to make a delicious and easy strawberry vanilla cake with this step-by-step recipe. Impress your friends and family with a moist and flavorful cake that is perfect for any occasion.
Servings 16
Calories 1076kcal
Ingredients
For the cake:
- 2.4 ounces freeze-dried strawberries (2 1.2-ounce bags)
- 2 ½ cups cake flour 283 grams
- 2 ½ cups all-purpose flour 312g
- 4 teaspoons aluminum free baking powder
- 1 teaspoon baking soda
- 1 ½ teaspoons salt
- 1 ½ cups unsalted butter 3 sticks at room temperature
- 3 cups granulated sugar 600 grams
- 4 large egg whites plus 2 whole eggs at room temperature
- 2 teaspoons vanilla extract
- 2 cups buttermilk
- pink gel food color optional
For the frosting:
- 3 cups unsalted butter 6 sticks, room temperature
- 9 cups icing sugar
- ¼ cup heavy cream
- 3 teaspoons vanilla extract
- ½ teaspoon salt
- pink gel food color
Instructions
Make the cakes:
- Preheat oven to 350°F. Grease and flour three 8” round cake pans, line with parchment paper circles that have been cut to fit. Line 12 mini cupcake tins with mini cupcake liners.
- Place freeze-dried strawberries in the bowl of a food processor, and pulse until they resemble a fine powder.
- In a large bowl, sift together flours, baking powder, baking soda and salt. Set aside.
- In the bowl of a stand mixer fitted with a paddle attachment, cream butter and sugar on a medium-high speed until fluffy and light in color. Scrape down the sides of the bowl as needed.
- Gradually add the 4 egg whites and 2 whole eggs to the creamed butter mixture (with the mixer on low speed), making sure each is thoroughly incorporated before adding the next egg.
- Add vanilla extract, strawberry powder and 3-4 drops of pink gel food coloring and mix until just combined.
- Add the dry ingredients in three batches alternating with buttermilk after each addition. Make sure not to overmix and scrape the sides of the bowl as needed.
- Fill each of the 15 miniature cupcake liners 2/3 full with cake batter, and then divide the remaining batter amongst the three cake pans.
- Place in oven to bake cupcakes for 10-12 minutes and the cake for 26-28 minutes. The cupcakes and cake are done when they spring back when gently touched or when inserted toothpick tester comes out clean.
- Place cupcake and cake pans onto cooling rack and allow to cool for 20 minutes before removing them from pans.
- Place cakes in refrigerator and allow to cool for 1 hours.
Making the frosting:
- In the bowl of a stand mixer fitted with a whisk attachment, beat the butter on a medium-high setting until light and fluffy.
- Slowly add half the icing sugar, cream, vanilla extract, and salt, beating until blended. Add remaining icing sugar and beat on medium speed until nice and smooth in texture, making sure all the sugar has been well incorporated. If your frosting is too thick add a tablespoon more cream.
- Adjust flavoring by adding another pinch of salt if your frosting is too sweet for your liking.
Assemble the cake:
- If the cakes have domed tops, use a serrated knife to cut the dome off so the layers are flat.
- Place the first layer of cake on cake stand and add 1 ½ cups of frosting. Using an off-set spatula evenly spread frosting to the outer edges, place the second cake layer over the first layer and add same amount of frosting spreading it evenly to outer edges.
- Place the final layer on top of the second layer, spreading 2 cups of frosting over the top and along the sides.
- Place remaining frosting in a piping bag fitted with a star tip.
- Pipe frosting onto 1 cupcake.
- Add 1 drop of gel food color to bag. Knead the bag to mix the frosting, then pipe 5 cupcakes with this medium shade of frosting.
- Add 1 more drop of gel food color to bag, knead to mix the frosting and then pipe 9 remaining cupcakes with this darker shade. Refrigerate until you are ready to stack and serve the cake.
- Just before serving, create a pyramid-like shape by placing the 9 darkest cupcakes on the top of the cake, repeat by stacking 5 of the middle shade cupcakes on top of the 9, and end with 1 white cupcake centered on top of the 5 cupcakes.
- **With the leftover icing, I piped little polka dots that I placed on the cake after they dried.
- Store the cake in an airtight container at room temperature for up to 24 hours, then refrigerate for up to 5 days or freeze for up to 8 weeks.
Notes
Refer to the article above for more tips and tricks.
The calories shown are based on the cake being cut into 16 pieces, with 1 serving being 1 slice of cake. Since different brands of ingredients have different nutritional information, the calories shown are just an estimate. **We are not dietitians and recommend you seek a nutritionist for exact nutritional information. The information in the nutrition box are calculated through a program and there is room for error. If you need an accurate count, I recommend running the ingredients through your favorite nutrition calculator.**
Nutrition
Calories: 1076kcal | Carbohydrates: 140g | Protein: 8g | Fat: 56g | Saturated Fat: 35g | Polyunsaturated Fat: 3g | Monounsaturated Fat: 15g | Trans Fat: 2g | Cholesterol: 191mg | Sodium: 498mg | Potassium: 178mg | Fiber: 1g | Sugar: 108g | Vitamin A: 1768IU | Vitamin C: 52mg | Calcium: 141mg | Iron: 2mg