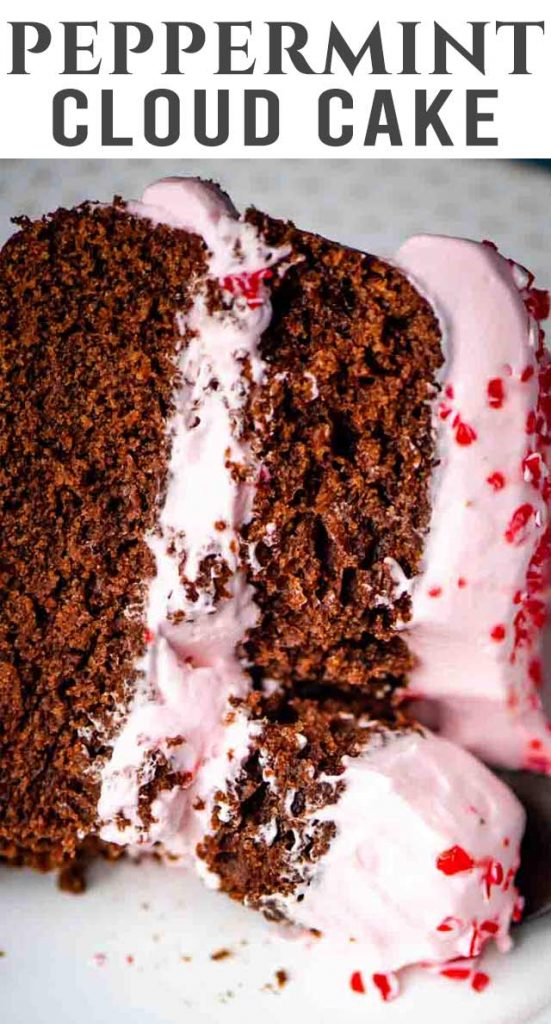
Rich chocolate layer cake with cool peppermint whipped cream. This Peppermint Cloud Cake is perfect for your Christmas dessert bar.
Chocolate and mint. Homemade chocolate cake. creamy cool peppermint. The combination of these two have always been one of my favorite things.
And this peppermint cloud cake is a beauty!
What is a cloud cake?
If you search the web for cloud cake, you’ll find many different versions. Is cloud cake an actual thing? Or is it just a name for a “heavenly” cake?
What we’ve found is that cloud cakes often reference cakes that have a fluffy, whipped frosting on top. It seems to be a common theme, and we’re here for it.
If you don’t like super sweet frosting, this cake is for you!
How to Make Cloud Cakes
This peppermint cloud cake is rich and chocolatey. It bakes up moist and delicious in a springform pan. We like to use a springform pan for two reasons:
This cake is a tall cake. A springform pan usually has about 3″ sides so it can hold a lot of batter without the cake spilling over.
You can easily remove the cake from the pan without worries of it sticking.
Can you use 2 9″ cake pans instead? Yes. But you’ll have to watch the baking time. They’ll bake much more quickly. And be sure to grease and flour the cakes well so that they come out cleanly from the pan.
Homemade Chocolate Cake
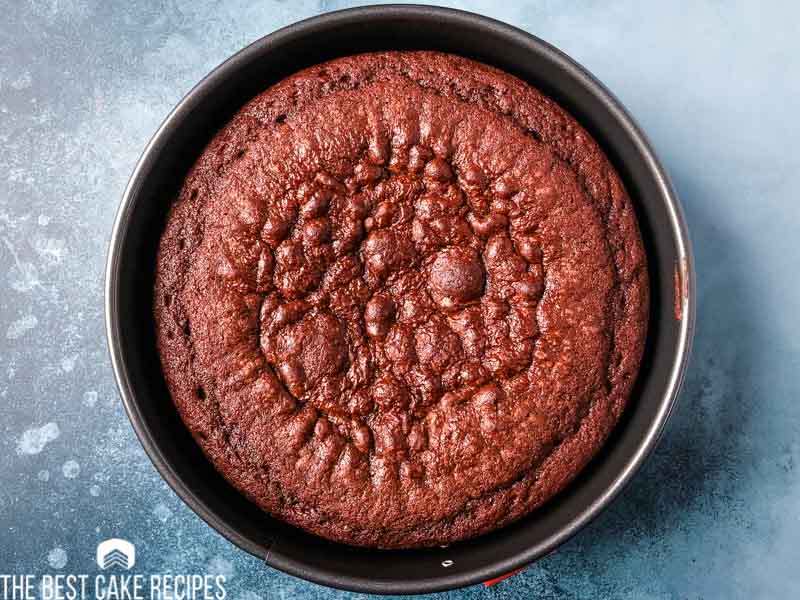
Preheat the oven to 350º Fahrenheit. Spray a 9″ springform pan with cooking spray. Place a parchment paper round in the bottom of the pan so you can easily remove the cake from the pan.
In a large bowl, place the flour, salt, sugar, baking powder, soda and cocoa powder. Use a whisk to mix and break up any clumps.
Add in the melted butter, milk and vanilla. (Use ½ teaspoon of peppermint extract if you’d like the cake to have a mint flavor too.)
Use a hand mixer to mix the ingredients together, scraping the sides of the bowl as needed.
Add the eggs and mix again until well blended.
Pour the batter into the prepared springform pan.
Bake for about 40 minutes or until the cake is set in the center. A toothpick should come out clean.
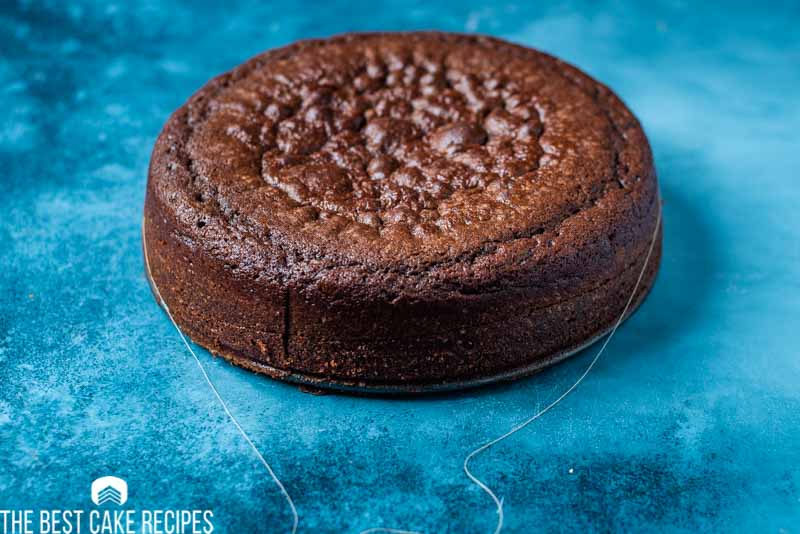
Allow the cake to cool completely. Then you can remove the sides of the pan.
Peppermint Whipped Cream
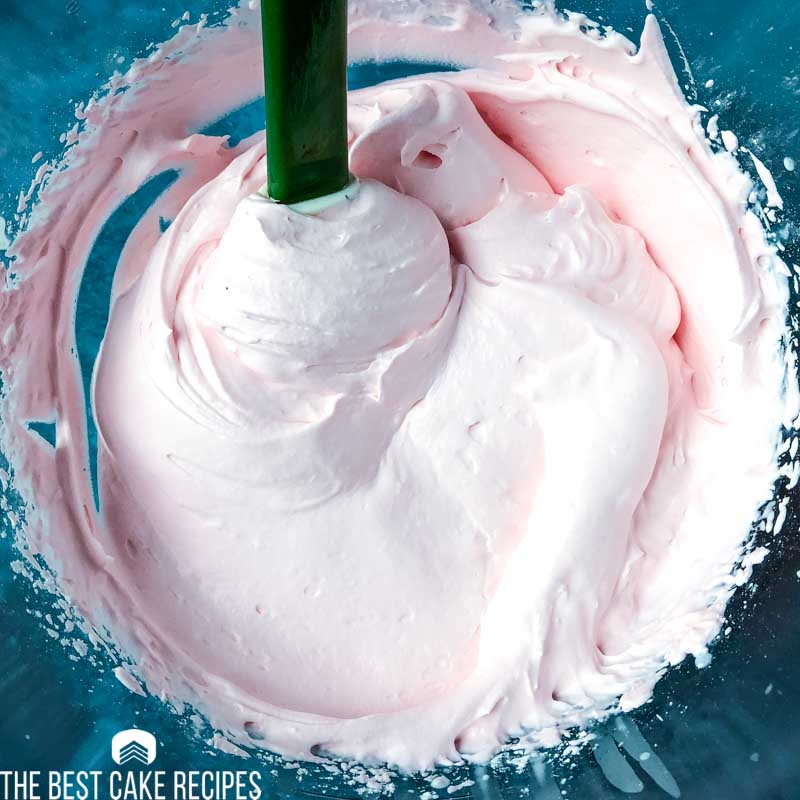
Homemade whipped cream is easier than you think! It’s important to start with very cold cream. You can even refrigerate the mixing bowl for 10 minutes so that the cream stays cold longer.
It’s best to use a stand mixer, but you can also use a high speed hand mixer.
Beat the whipped cream until it is stiff. (Make sure the cream is very cold.)
Add in the powdered sugar, extract and food coloring. Beat again until the color is evenly distributed.
The food color is totally optional and just for fun!
Assemble the Cake
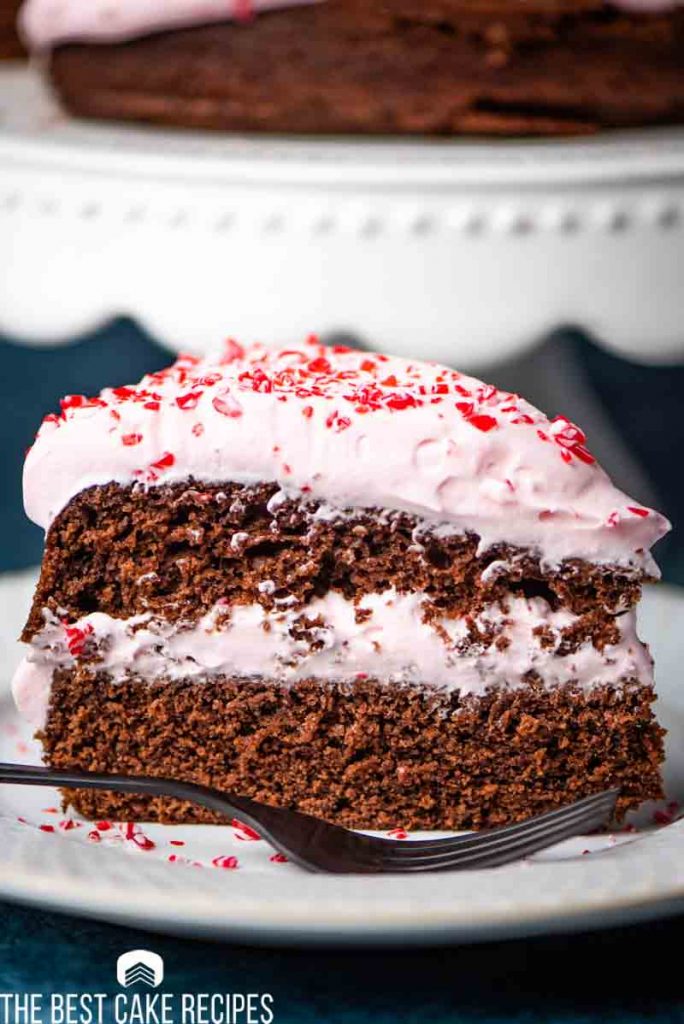
We used a long thread to slice the cake in a two nice clean pieces. Wrap a piece of thread (or unwaxed, unflavored floss) around the center of the outside of the cake. Cross the thread in front of you and hold it tightly. Pull each thread away from the cake so that the thread slices through the cake. Make sure you hold the thread evenly so it cuts cleanly.
If you’d like, you can score the outside of the cake with a sharp knife where you want the cut to be. This will help the thread stay in the right place.
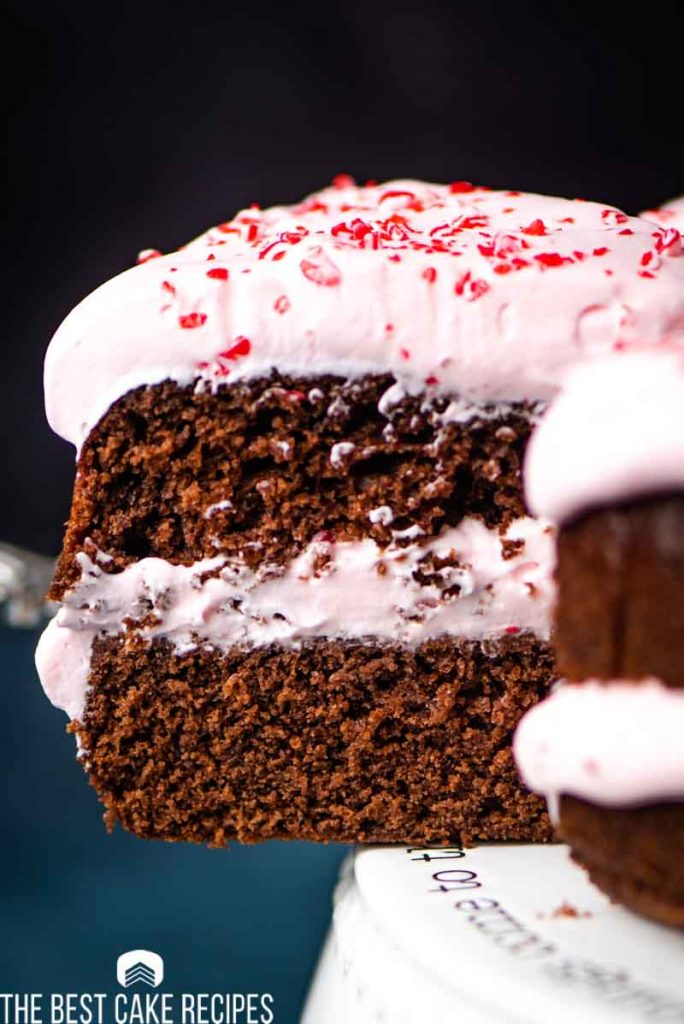
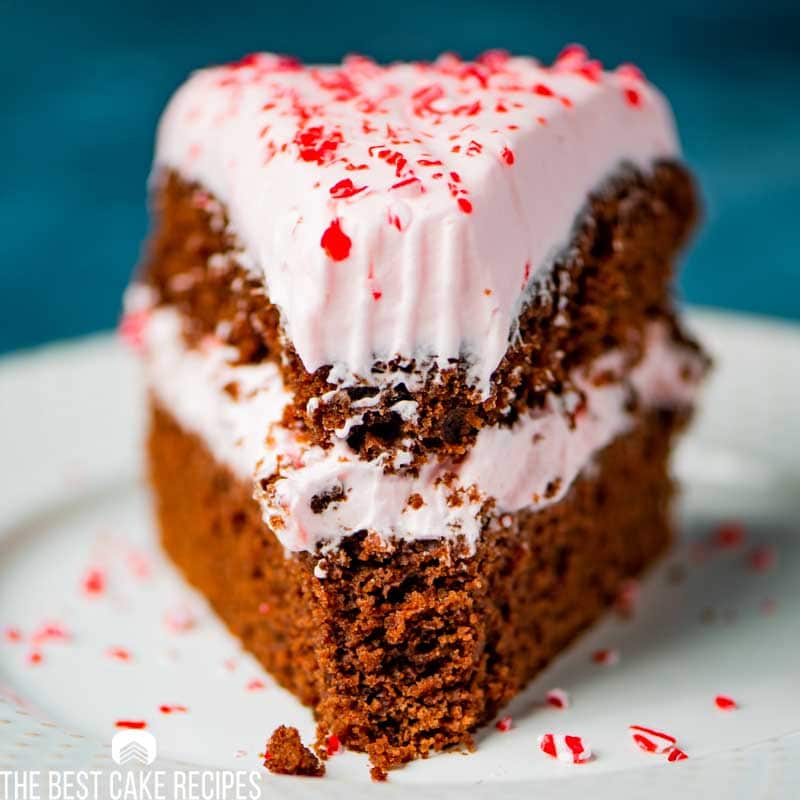
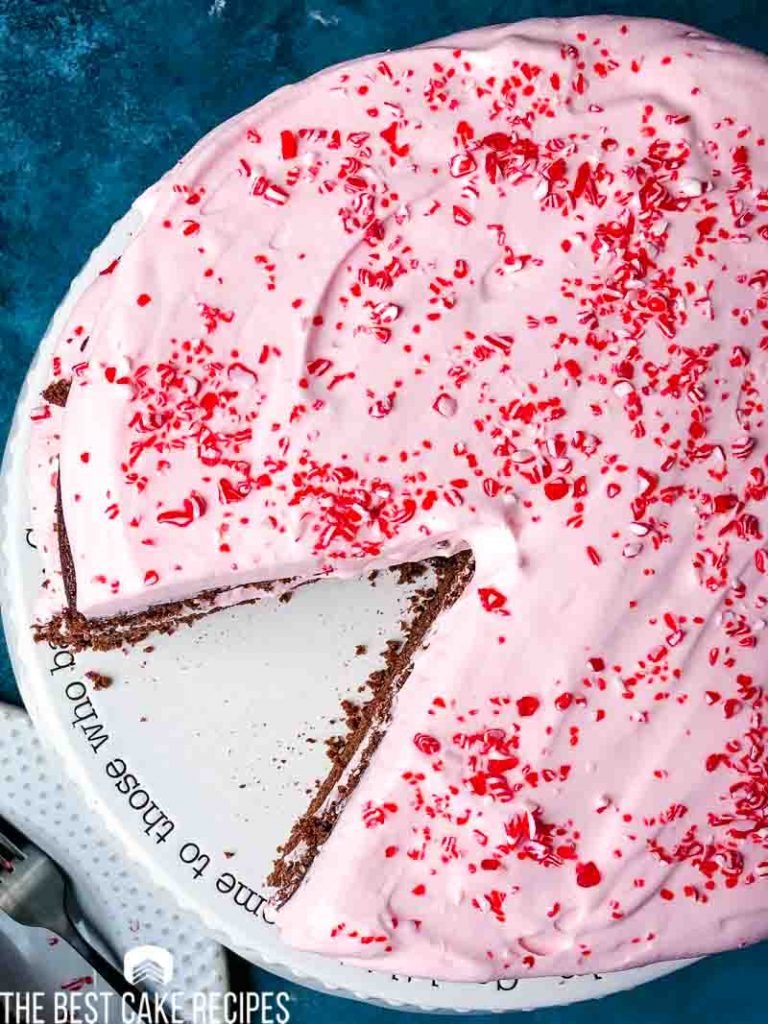
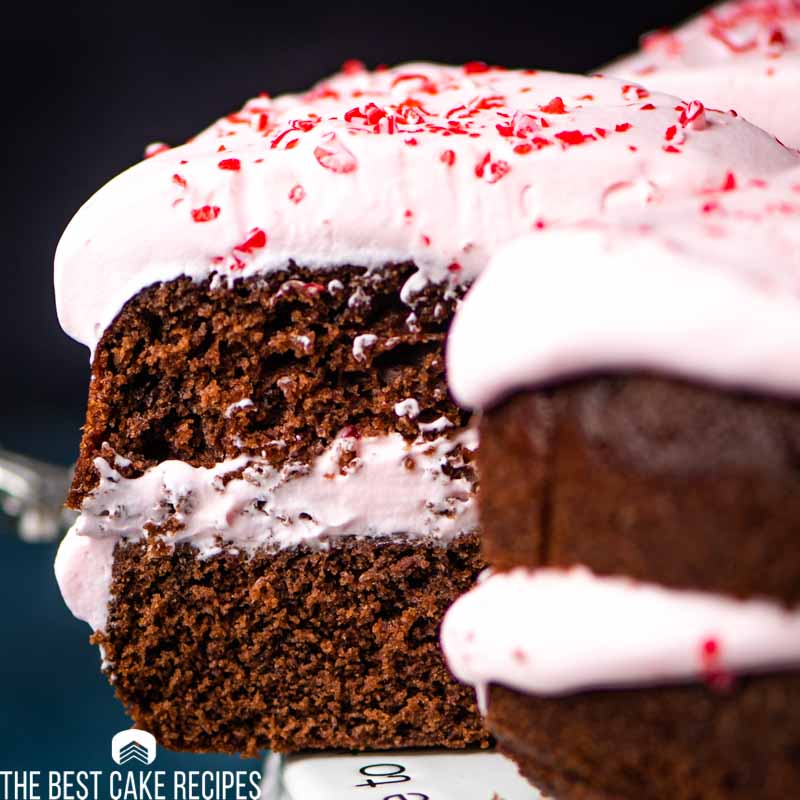
We assemble the cake in 4 layers:
cake
whipped cream
cake
whipped cream
Then we top it with crushed peppermints. You can put crushed peppermints on the first layer, too.
**Side Note: If you’d like, you can leave the cake whole. Just pile that whipped cream high on top of the chocolate cake. It will look more like a “cloud” that way!**
How to Store Cake with Fresh Whipped Cream
Because of the freshly whipped cream, you’ll want to store this cake in the refrigerator. It keeps best if it is stored in an airtight container.
To take some of the chill off before serving, remove the cake from the fridge about 20-25 minutes before serving.
Can you freeze cloud cake?
Yes! This cake freezes well. You can freeze it in an airtight container for 6-8 weeks.
It’s important to allow this cake to defrost in the refrigerator. Place the container in the refrigerator for at least 8 hours to defrost. Don’t open the freezer container before it is defrosted. This will help the cake stay fresh.
Preheat the oven to 350º Fahrenheit. Spray a 9" springform pan with cooking spray. Place a parchment paper round in the bottom of the pan so you can easily remove the cake from the pan.
In a large bowl, place the flour, salt, sugar, baking powder, soda and cocoa powder. Use a whisk to mix and break up any clumps.
Add in the melted butter, milk and vanilla. Use a hand mixer to mix the ingredients together, scraping the sides of the bowl as needed.
Add the eggs and mix again until well blended.
Pour the batter into the prepared springform pan.
Bake for about 40 minutes or until the cake is set in the center. A toothpick should come out clean.
Allow the cake to cool completely.
Make the whipped cream:
Beat the whipped cream until it is stiff. (Make sure the cream is very cold.)
Add in the powdered sugar, extract and food coloring. Beat again until the color is evenly distributed.
Assemble the cake:
Use a thread to cut the cake in half. This gives a nice, almost crumb free cut. You can also use a long sharp knife to slice the cake in half.
Place one cake layer on the cake plate.
Spread the top with half of the peppermint cream. Sprinkle with crushed peppermints.
Place the second cake layer on top.
Dollop and spread the remaining peppermint cream on top of the cake.
Sprinkle with crushed candy canes.
Refrigerate until serving.
Notes
The calories shown are based on the cake being cut into 12 pieces, with 1 serving being 1 slice of cake. Since different brands of ingredients have different nutritional information, the calories shown are just an estimate. **We are not dietitians and recommend you seek a nutritionist for exact nutritional information.**
We are Julie, Maddie, and Kinslee – a mother and daughter team sharing with you the best cakes to satisfy any need or sweet craving that you may have. Welcome to our family’s kitchen!